
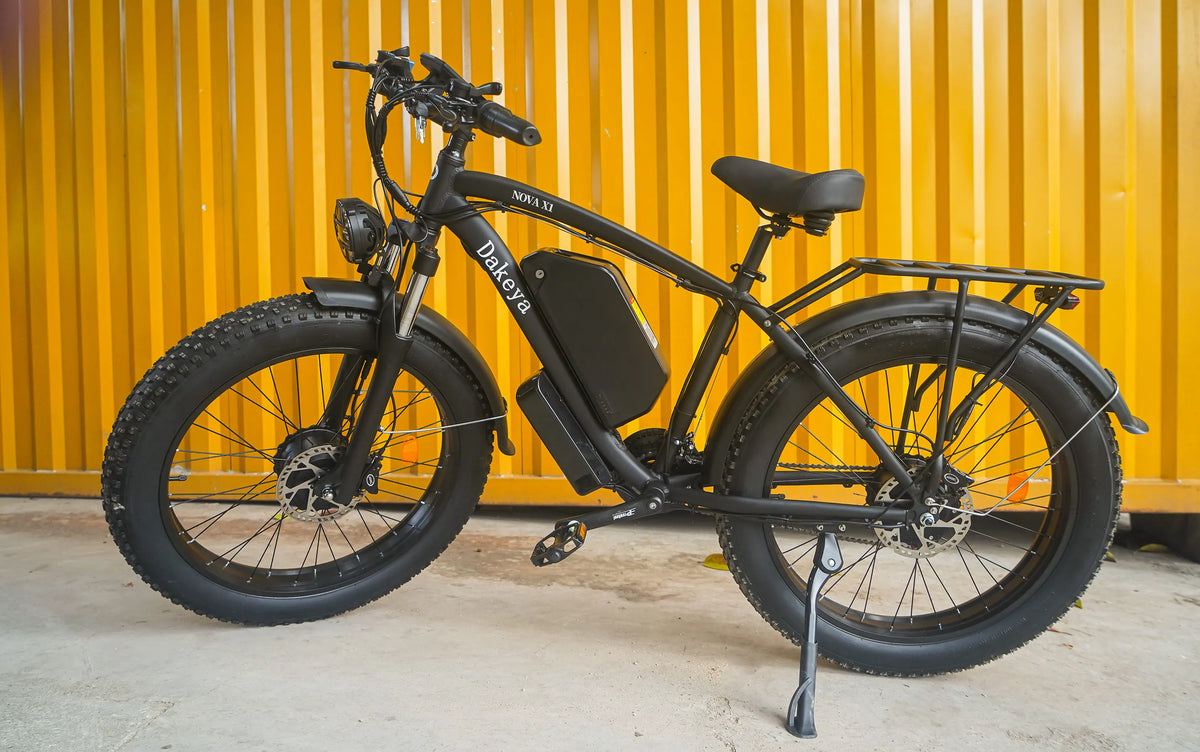
Mud, dust and road salt do more than make an e-bike look untidy. Left in place, grime can hide loose hardware, accelerate corrosion and carry abrasive particles into the drivetrain. This guide explains how to clean a fat-tire electric bike without directing water into electrical parts or washing lubricant out of bearings. It is written for the currently available Dakeya NOVA X1 and Dakeya DA03, but the method applies to many large, dual-motor e-bikes.
Always follow the manual supplied with your bike. If the bike has crash damage, exposed wiring, a swollen battery, heat damage or a strong electrical odor, stop using it and contact support rather than washing or charging it.

What you need
- Two buckets: one for mild soapy water and one for rinsing the cloth
- Soft microfiber cloths and a soft detailing brush
- A bicycle-safe cleaner or a small amount of mild dish soap
- A low-pressure spray bottle or damp sponge
- Chain cleaner and bicycle chain lubricant
- Clean towels, nitrile gloves and a work stand if available
Avoid pressure washers, steam cleaners, aggressive degreasers, gasoline, household solvents and stiff wire brushes. High-pressure water can drive grit and moisture past seals. Strong chemicals can discolor finishes, damage plastics and contaminate brake pads.
1. Power down and prepare the bike
Move the bike to a shaded, ventilated place with good drainage. Turn it off, remove the key and disconnect the charger. Never clean an e-bike while it is charging. Let hot brakes, motors and the battery cool to room temperature before beginning.
If the battery is designed to be removed and the manual permits it, remove it and place it on a clean, dry, nonconductive surface away from the wash area. Keep the battery terminals dry. If you leave the battery installed, confirm it is fully seated and that covers over charging ports and connectors are closed. Do not improvise waterproofing with foil or materials that could short contacts.
Take a quick photo of the bike before cleaning. It gives you a useful reference for cable routing and makes it easier to notice a missing cap, shifted component or fresh scrape later.
2. Remove loose dirt before adding water
Start dry. Use a soft brush to lift packed mud from tire tread, fenders, the underside of the frame and the area around the kickstand. Work from top to bottom. Rotate each wheel slowly and inspect the complete tread. Pull out leaves and loose debris by hand, but do not dig at the tire with a screwdriver or other sharp tool.
Dry removal matters because rubbing a sandy film across paint acts like sandpaper. On a fat-tire bike, the large tread can hold surprising amounts of gravel. Clearing it first also helps you see cuts, embedded objects and uneven wear.
3. Wipe the frame with controlled moisture
Mix a small amount of mild soap with water. Wet a cloth, then wring it out until damp rather than dripping. Wipe the frame, fork legs, fenders and accessible hard surfaces. Rinse the cloth frequently in the second bucket so grit is not transferred back to the paint.
For seams and corners, apply cleaner to the brush or cloth—not directly into the bike. Keep liquid away from the display, switches, throttle, charging port, battery contacts, motor cable exits and electrical connectors. Never submerge any component. Around electronics, use a barely damp cloth followed immediately by a dry one.
Road salt deserves prompt attention because it attracts moisture and encourages corrosion. Use several passes with a clean damp cloth rather than one heavy rinse. Continue until the cloth no longer picks up a salty film.
4. Clean wheels and tires carefully
Wipe sidewalls and tread with a separate cloth or soft brush. This prevents drivetrain grease from reaching the tires. Inspect both sides of every tire for cracks, cuts, bulges, exposed casing or objects lodged in the tread. Check that the valve stems sit straight and retain their caps.
Do not coat tires with glossy automotive dressing. A slippery product can migrate to the tread or brake surfaces. After cleaning, use an accurate gauge and set pressure according to the tire sidewall, bike manual, load and riding conditions. Do not guess from how the tire looks.
5. Protect the brakes from contamination
Disc rotors and pads require special care. Keep soap, chain lubricant, polish and degreaser away from them. Use a dedicated clean cloth for the braking area. Do not touch rotor braking tracks with greasy fingers. If a rotor needs more than a dry wipe, use a brake-specific product approved by the brake manufacturer.
After the bike is dry, squeeze each brake lever while stationary. The lever should feel consistent and should not pull unexpectedly to the handlebar. Spin each wheel by hand and listen for severe rubbing. Before normal riding, perform a slow-speed brake test in a clear, level area. Persistent squealing, weak braking, fluid leakage or a damaged rotor calls for inspection by a qualified technician.
6. Degrease and relubricate the drivetrain
The chain, chainring and rear gears collect a paste of oil and dust. Use a bicycle drivetrain cleaner sparingly, following its label. Apply it to a brush or chain-cleaning tool instead of flooding the bike. Keep it away from brakes, electrical components and tire tread.
Turn the cranks by hand only when you can do so safely. Wipe the chain until the cloth stops collecting heavy black residue, then let it dry. Apply bicycle chain lubricant one drop at a time to the rollers. Allow it to penetrate, then wipe off the excess. More lubricant is not better: a wet outer surface attracts grit.
If shifting remains noisy after cleaning, do not force the controls. A bent derailleur hanger, damaged cable or misadjusted drivetrain needs diagnosis rather than extra lubricant.

7. Dry before storage or charging
Use clean towels to dry the frame, wheels and accessible hardware. Let the bike air-dry in a ventilated place. Do not use a heat gun or place the battery next to a heater. Pay attention to bolt heads, cable guides and low points where water can collect.
Reinstall a removable battery only when the battery, contacts and mounting area are completely dry and visually clean. Do not charge immediately after a wet ride or wash. Follow the manual’s guidance and make sure the charging port is dry before connecting the correct charger.
8. Turn cleaning into an inspection
A clean bike is easier to inspect. Check:
- Axles and wheels for looseness or side-to-side play
- Handlebar, stem, seat and pedals for movement
- Brake hoses and electrical cables for abrasion, pinching or sharp bends
- Frame and fork for cracks, deep dents or impact marks
- Suspension areas for leaks or unusual residue
- Battery mount and charging-port cover for secure fit
- Lights, display and controls for normal operation after everything is dry
Use the torque values and procedures in the owner’s manual. Randomly overtightening bolts can damage threads or components. For a broader routine, pair this wash process with the pre-ride safety checklist and the maintenance schedule.
NOVA X1 and DA03: where to focus
Both current models are substantial fat-tire e-bikes with electrical wiring, large tires and disc brakes, so the same low-moisture principles apply. The practical difference is access: follow the actual cable paths and suspension layout on the bike in front of you. Do not assume a hidden connector is sealed simply because the exterior looks rugged.
On the NOVA X1, take time around the battery interface, wheel motor cable routing and areas where mud can collect behind the tires. On the DA03, also inspect around the additional suspension structure and pivot areas. A soft brush is safer than forcing a cloth into a narrow moving joint.
How often should you clean an e-bike?
There is no useful one-size-fits-all calendar. Wipe away salt, mud and corrosive grime soon after exposure. A dusty bike used in dry weather may only need a light wipe, while a wet trail ride may justify a more complete clean. The drivetrain should be cleaned and lubricated when it sounds dry, looks contaminated or after conditions have stripped lubricant away.
Frequent washing is not a substitute for service. Bearings, suspension, brakes, spokes and electrical systems still need periodic inspection. If the bike has been submerged, crashed or exposed to flooding, stop riding and have it assessed.
Common cleaning mistakes
- Using a pressure washer: speed is not worth forcing water past seals.
- Spraying cleaner directly at the display or connectors: apply it to the cloth instead.
- Using one rag everywhere: brake surfaces need a dedicated grease-free cloth.
- Leaving the chain wet: dry it, lubricate correctly and remove excess.
- Charging while damp: allow the charging area and battery interface to dry fully.
- Polishing over damage: investigate cracks, heat marks and exposed wires first.
A simple post-ride routine
- Power off and let the bike cool.
- Brush off loose dirt.
- Wipe salt or mud with a damp cloth.
- Inspect tires, brakes, cables and the frame.
- Dry the bike completely.
- Lubricate the chain only if needed.
- Store indoors in a dry, temperature-stable location.
Good cleaning is controlled, not aggressive. The goal is to remove contamination while keeping water and chemicals away from the parts that do not need them. If you are deciding between the two current models, read the NOVA X1 and DA03 buying guide, then confirm current details on the individual product pages before ordering.


Share:
How to Choose a High-Power Fat-Tire E-Bike: NOVA X1 vs. DA03